


Do you want to feel the thrill of crafting your beer at your convenience? Don’t want to go over the top and plunge into all-grain brewing? While the traditional method of homebrewing involves a lot of equipment, time and effort, there are a few simpler ways to start this new hobby with minimal fuss.
Regardless of why you want to get into brewing your beer, the modern and hectic lifestyle often leaves us with limited time to dedicate to a newfound passion. Many of us are left struggling to find ways to fit in the extra activities between our daily routines. But lo and behold, the simple yet effective Grainfather System comes to the rescue.
What Does a Grainfather System Do?
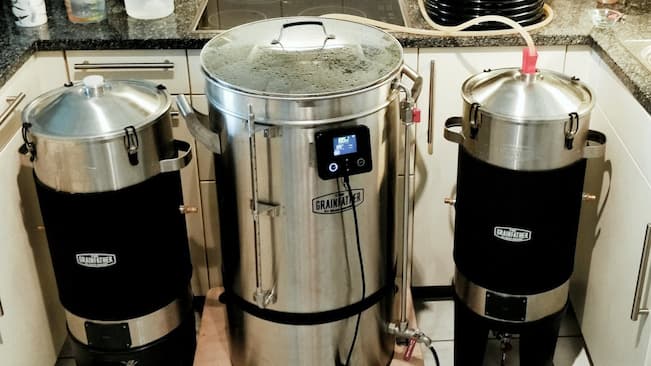
To fully reap the benefits of this convenient and user-friendly system, you need to understand how it works and what it does for you. In its simplest form, a Grainfather System is a complete all-in-one brewing system that uses a combination of grain, hops and water to produce different beer styles.
Its main feature is the ability to control temperatures, which is the cornerstone of a successful batch. The more you control the temperatures, the more efficient and precise your beverage will be. Of course, newcomers and experienced brewers alike will appreciate the fact that it takes out the guesswork and the whole process can be completed with minimal effort.
What Equipment Do You Need with a Grainfather System?
Naturally, the parts and pieces that make up the Grainfather System are what gives the user the ability to brew a quality beer in a short amount of time. The equipment that takes part in the process includes:
Fermenters
Kicking things off with what is essentially the heart of the system, a reliable Grainfather fermenter controls the temperature of the wort and can maintain its set temperature as well as cool down quickly. It infuses oxygen into the wort to promote to create a healthy environment for the yeast.
The general build of a Grainfather fermenter should be stainless steel to ensure that it does a good job of keeping out bacteria and other contaminants. The top should be airtight, and the bottom should have a drain to connect to a hose for easy cleaning.
It’s attached to a standard electric heating element that controls temperatures. Once the wort boils and the hop additions have been made, the fermenter is connected to a sparge heater that filters out any remaining solids.
Make sure your fermenter is large enough to accommodate your batch size, as this will greatly impact the quality of the final product. If you get one that’s too small, the levels of foam and evaporation will be excessive, while a larger model may be too expensive and impractical for a small batch.
Focus on what you have available and aim for a fermenter at least 25% larger than your batch volume. It will allow the temperature to stay consistent, create a better environment for the yeast, and reduce the risk of contamination.
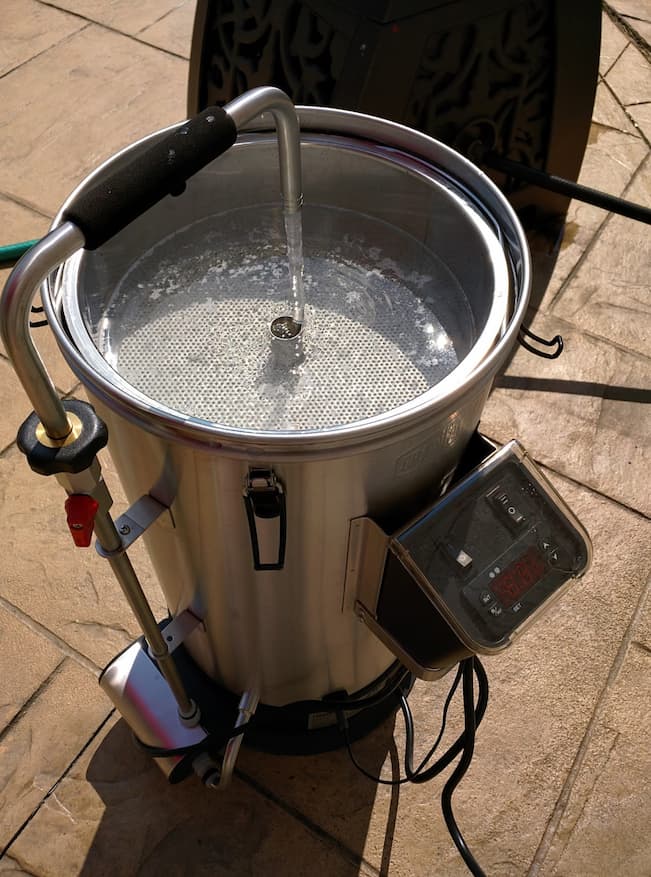
Sparge Heaters
Speaking of sparge heaters, they are responsible for ensuring that all of the solids are filtered out of your wort. They’re a fancy name for a filter – the type which will depend on the size and shape of your grain bill.
Sparge heaters are used to help with the mashing process and can be a superb way of improving the efficiency of your brewing. The most common types are bag filters and false bottoms, but you can also use a recirculating filter for larger batches. The first two are fairly straightforward to use, while the latter requires a little more finesse.
Airlock and Rubber Stopper
Anyone who’s had at least some experience with brewing can tell you that airlocks are critical for preventing oxygen from entering the fermenter. At the same time, they also let carbon dioxide escape so that it doesn’t build up too much pressure in the fermenter and cause a pressure-related explosion.
The type of airlock you’ll need will depend on the size of your fermenter. Most homebrewers opt for a two-piece airlock, which is the most common type and has a simple valve on the bottom. You’ll also need a rubber stopper to fit your airlock into the fermenter’s opening, which should be large enough to properly support a bottle-style airlock.
Immersion Chiller
Next up is a vital piece of equipment that helps your wort cool down and gives you control over the temperature during fermentation. It’s primarily a coiled copper pipe that is submerged in the wort and connected to a cold water source. As the cold water runs through the pipe, it absorbs the heat from the wort and helps it cool down.
In most cases, the cold water source will be your kitchen sink, but you could also use a nearby lake or pond during summer. Make sure that the chiller is made from food-grade materials and that the copper pipes are coated in a non-toxic coating.
Fluid Transfer Pump
When you’re working with a large batch of wort, it can be difficult to move one liquid from one container to another. This is where a fluid transfer pump comes in – it’s responsible for moving the wort from the mash tun to the fermenter.
What’s great about transfer pumps is that they can be adjusted to different speeds, allowing you to control the rate of flow. How much power you’ll need depends on the size of your batch, but most homebrewers opt for a pump with at least 3-4 PSI.
Hydrometer
This device measures the sugar content in your wort and tells you how much of the sugar has been converted into alcohol during the fermentation process. The way it works is simple – it measures the number of dissolved solids in a given volume of liquid. The more solids, the higher your gravity reading will be.
To get the most accurate results, you’ll need to use a hydrometer that’s been calibrated for your specific brewing system. When you’re ready to measure the gravity of your wort, fill a test tube with some wort and submerge the hydrometer.