


Today, factories, warehouses, and many other industrial sites cannot run smoothly without the help of utility trailers. Utility trailers are extremely useful vehicles for anyone who often needs to take heavy tools, machinery, and other large items of work equipment from one place to another.
In order to perform reliably, trailers require quality wheel bearings and regular maintenance. Trailer wheel bearings might be small, but they play an immensely important role in delivering your load safely to the selected destination. Read on to find out why that is so and how to replace them when they become noisy.
Trailer wheel bearings reduce the amount of friction, allowing the trailer wheels to move more freely. These parts are indispensable for trailers that carry heavy loads because without bearings the wheels will struggle to complete their task successfully and may sustain damage in the process. Trailer wheel bearings are protected from road debris and other environmental elements with seals and dust caps.
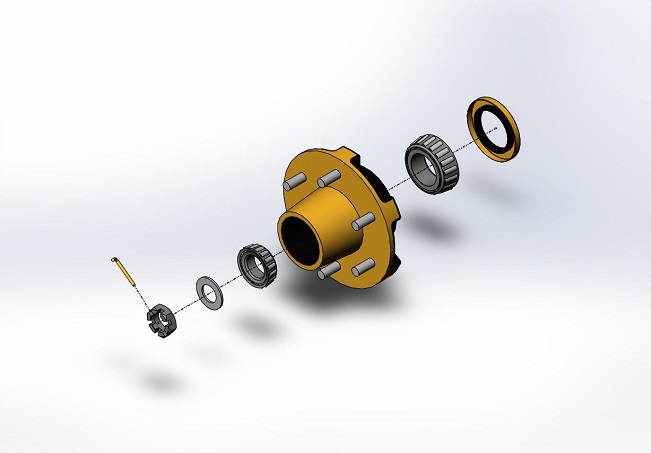
When it comes to replacing trailer wheel bearings, new split pin, new seal, new dust cover or bearing protector, and new bearings are needed. Instead of buying these items separately, you can visit a physical or online industrial hardware store and purchase a trailer wheel bearing kit. Practically every reputable industrial hardware shop sells high-quality trailer wheel bearing kits that include all the necessary parts (bearings, seal, and grease) plus fitting instructions.
Aside from a nice trailer wheel bearing kit, you will also need certain tools to get the job done successfully. A bearing packer will help you pack bearing grease on the bearings; a flat-head screwdriver is used for removing or prying off pieces like dust caps; a hammer will come in handy when you will need to pry off pieces and put them back in place; a jack will help you raise the trailer off the ground so its weight does not rest on the wheels; and least but not least, pliers will aid you grip hard-to-reach parts. You will also need kerosene or solvent, a container to wash the parts in, and sandpaper.
The procedure of replacing trailer wheel bearings is not an extremely complex one. The first step is removing the hub assembly without letting the outer bearing to fall out. The inner bearing and seal will come out with the hub. Next, you should remove the outer bearing by lifting it out. You should also remove all of the grease from the hub assembly with the help of kerosene or solvent.
The next two steps are checking the spindle for scoring, damaged thread, or any other type of damage and applying a light coating of grease on it. You should also inspect the hub bore and cup backing shoulder for nicks and burrs. If you find any, remove them.
After that, you should hand-pack the new bearings by forcing grease under the cage between the rollers. Once you complete this task, you should install the inner and outer bearing into the hub. Pay attention to the seal, as it needs to be correctly pointed. Next, you should slide the hub onto the spindle, apply preload to the bearing before final adjustment, install the cup, re-install the wheel, and give the trailer a test tow.
See also: